Showing posts with label Mobile Phone. Show all posts
Sunday, November 20, 2011

Nokia camera on standby and operation failed solution

This solution can be applied in all Gsm gadgets box using a DCC file.

FAQ about DCC file

DCC file = DCC file is a camera configuration setting file.

Why some model have many DCC file ?
         -Because of many manufacturer supplier & version for the camera module .
 
Which situation of i should write the DDC file to the phone ?
       -When open camera function, the phone screen show blank or black color, after that
         display an error of 'Operation failed' & 'Camera on standby'.
 
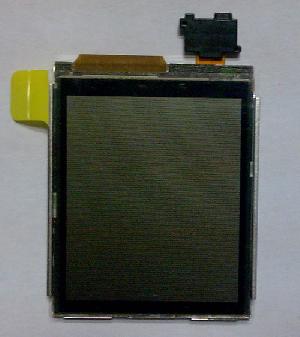
Why i was tried all DCC file but the problem still remain ?
    -That is Hardware problem. Take out the camera & clean, adjust or change it.
     Please make sure the camera module is fit when insert into the socket !
 
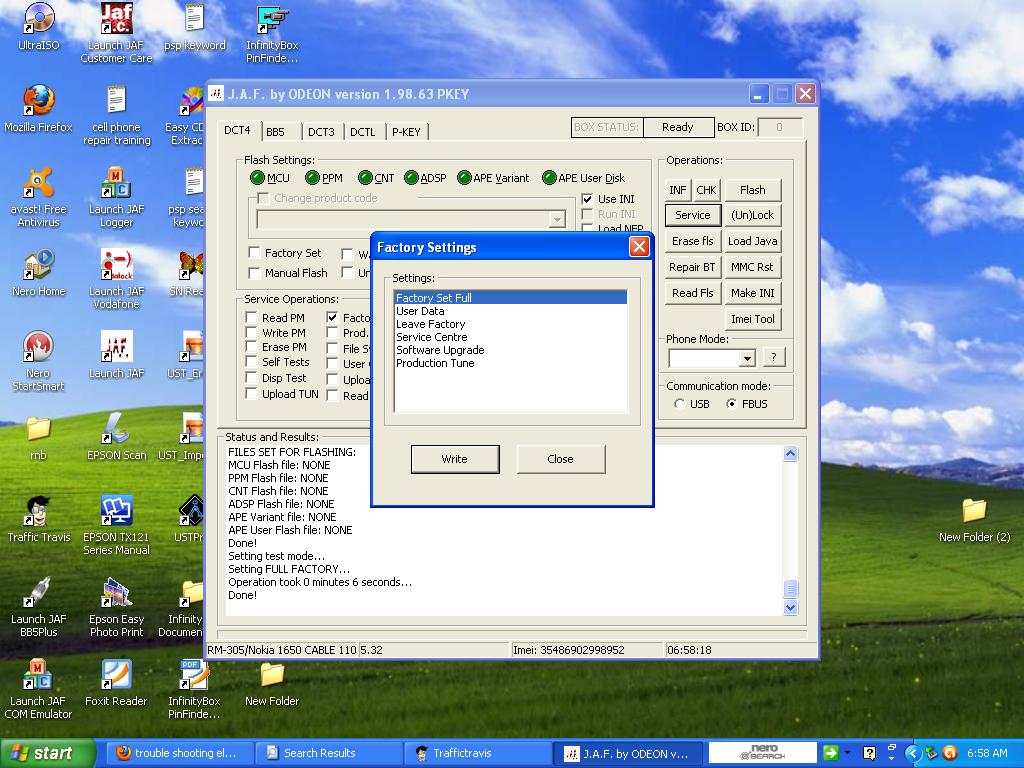
Which SW or BOX is supported write this DDC file to the phone ?
      -The DCC file that attach here is converted from Original DCC file to .pm format.
       So all SW or BOX from the market that have Write PM function is supported. Just load
       the DCC file & simply press write PM

Please test from one by one by higher version of the DCC file 1st !

All model of Nokia untill Feb 2010 that are using DCC file to configuration camera HW is listed below :


1680c
1680c_GR0103D101260C206C02_v001.009.pm
1680c_GR0103D1012601022C00_v001.004.pm
1680c_GR09733814140C206C02_v001.003.pm
1680c_GR097338141401022C00_v001.002.pm


2220s
2220s_GR0103D101260C213402_v001.008.pm
2220s_GR0103D1012601022E05_v001.007.pm


2330c
2330c_GR0103D101260C213402_v001.008.pm
2330c_GR0103D1012601022E05_v001.007.pm


2600c
2600c_GR0103D101260C206C02_v001.008.pm
2600c_GR0103D1012601022C00_v001.003.pm
2600c_GR09733814140C206C02_v001.003.pm
2600c_GR097338141401022C00_v001.002.pm

2680s
2680s_GR0103D101260C206C02_v001.009.pm
2680s_GR0103D1012601022C00_v001.004.pm
2680s_GR09733814140C206C02_v001.003.pm
2680s_GR097338141401022C00_v001.002.pm


2690
2690_NI00IIIIRR030C20C605_v003.001.pm
2690_NI00IIIIRR030C20C607_v003.003.pm
2690_NI00IIIIRR030C213401_v003.001.pm
2690_NI00IIIIRR030C213402_v003.002.pm
2690_NI00IIIIRR0301022E01_v003.001.pm
2690_NI00IIIIRR0301022E05_v003.002.pm
2690_NI00IIIIRR0301035420_v003.008.pm


2700c
2700c_NIMMIIIIRRFF0A021001_v002.007.pm
2700c_NIMMIIIIRRFF094B2F01_v002.014.pm
2700c_NIMMIIIIRRFF06150018_v002.008.pm
2700c_NIMMIIIIRRFF06150110_v002.005.pm


2720f_GR0103D10126095A1F05_v001.005.pm
2720f_GR0103D10126095A1F07_v001.006.pm
2720f_GR0103D10126095A1F87_v001.004.pm
2720f_GR0973381414095A1F05_v001.006.pm
2720f_GR0973381414095A1F07_v001.003.pm
2720f_GR0973381414095A1F87_v001.003.pm


2730c
2730c_NI00IIIIRR030102F201_v005.006.pm
2730c_NI00IIIIRR030102F202_v005.006.pm

2760
2760_GR0103D101260C206C02_v001.009.pm
2760_GR0103D1012601022C00_v001.004.pm
2760_GR09733814140C206C02_v001.003.pm
2760_GR097338141401022C00_v001.002.pm


3710f
3710f_NI00IIIIRR030C20C605_v003.001.pm
3710f_NI00IIIIRR030C20C607_v003.003.pm
3710f_NI00IIIIRR030C213401_v003.001.pm
3710f_NI00IIIIRR030C213402_v003.002.pm


5130
5130_NIMMIIIIRRFF0A021001_v002.007.pm
5130_NIMMIIIIRRFF094B2F01_v002.014.pm
5130_NIMMIIIIRRFF06150018_v002.008.pm
5130_NIMMIIIIRRFF06150110_v002.005.pm


6303i
6303i_NI00IIIIRR030C20C607_v003.003.pm
6303i_NI00IIIIRR0301035420_v003.008.pm


7230
7230_NI00IIIIRR030C20C607_v003.003.pm


E66_86L103000104094C1003_v001.017.pm
E66_86L10300010406260000_v001.509.pm
E66_86L10300010406260004_v001.509.pm
E66_8600030001040C208A03_v001.005.pm
E66_86000300010401022B04_v001.008.pm


X3
X3_NI00IIIIRR030C20C607_v003.003.pm
X3_NI00IIIIRR0301035420_v003.008.pm


E71
E71_86L103000104094C1003_v001.017.pm
E71_86L10300010406260000_v001.009.pm
E71_86L10300010406260004_v001.009.pm
E71_8600030001040C208A03_v001.005.pm
E71_86000300010401022B04_v001.008.pm


DOWNLOAD LINK FOR DCC FILE =  CLICK HERE
Thank you sweetdeep for sharing this information...


Monday, November 14, 2011

Cell phone repair tutorial - blumentritt Sta. Cruz Manila Philippines


Accepting students for cell phone repair tutorial.
Hands On and practical way of learning/teaching and also based on my 8 years of repairing cellphone.


I. Electronics

II. Preparing the Proper Tools For Repairing

III. Safety Procedures and Proper Handling of Tools and Test Equipments on Cellphone Repair

IV. Test and Check up Procedures on Basic Electronics Components

V. Reading Cellphone's Schematic Diagrams

VI. How to Find and Locate Components on PC BoardHow to Solder SMD Components Manually by Hand
How to Reball BGA Chips Manually by Hand

VII. Basic Hardware Handling Procedures
Hardware Troubleshooting Basics

VIII. Basic Mobile Phones Hardware Repair Techniques

IX. Basic on Software Handling
What is Flashing
What is Unlocking

Requirements: basic electronics knowledge.

All of these for as low as P 1,500.00/head

Big discounts for group training!

Training will be conducted for 3 days or it will depends on your availability.

This is now your chance to start your cellphone repair business!
Or have additional earnings aside from your monthly fix salary!

If interested contact me:

Edwin
09474347937
Wednesday, July 27, 2011

How to learn to fix mobile using diagram

In this tutorial I will teach you how to learn to fix mobile using diagram. Reading schematic diagram is a must have skills every technician should concentrate on learning.


For demonstration purposes I will teach to how to repair a no power Nokia.

Upon receiving the cellphone from the customer I ask basic questions to identify where in the phone is the problem.

1. What is the problem of the cellphone?
ans. It wont power on but I notice it is charging.

From the question I made and the answer from the customer I suspect that there is an open circuit from the power on signal coming from the switch to PWRONX of the power IC or UEM.

Now is the time to trace where is the open pattern. You see technicians must have a skill in reading mobile diagram.

Here is the basic step how to learn to repair using cell diagram.

Procedure:

1. Identify the components.


 2.  Now we can determine the different component to work on are:

S302- SWITCH
C310- CAPACITOR
R306- RESISTOR

3.  Next is read the equivalent schematic diagram.

How to learn to fix mobile using diagram


4.  From the schematic diagram above in order for the cell phone to power on you need to push the switch to trigger the PWRONX of the power supply.  After you push the switch the signal will travel from switch to R306 to PWRONX of the UEM.

5.  Using your VOM you need to test the switch if it is good.  Next is test the resistor.  Upon testing the two components I notice that the resistor is open.  It wont give me any resistance reading.

6.  Replace R306 using the same value and component from another or the same mobile board.

7.  Assemble and test now you can power on your cell phone.

In this tutorial you gain the knowledge how to learn to fix mobile using diagram.

Do you want to learn more?


Tuesday, July 26, 2011

Spyware for cell phones

Technology today is ever changing for better.  In the past we are worried about virus and trojan that could steal important information from our computer.  Nowadays there are spyware for cell phones that was made to monitor you and can steal information from your mobile as well.


This software is not just to take advantage of people around you but this software is built with security in mind.  It was created by programmers to help each of us secure our family from threat outside our home.

Introducing Spyphone spyware for cell phone.  What is Spyphone?  SPYPHONE is cell phone spyware that you install on the target mobile phone. Spyera SPYPHONE is software you download directly into the phone, using the phones web browser and Internet connection. So you don’t need any PC connection, CD, and cable.

Who uses Spyphone? Is my Husband or Boyfriend cheating on me? Is Your Wife Cheating? Is Your Spouse Cheating on You?, IS YOUR COMPANY AT RISK?, IS YOUR CHILD AT RISK? See there are a lot of uses.

How does it work?  This spying on cell phone software is downloaded directly into the phone you wish to spy on. We call this the Target phone. Spyphone is not a virus and there is no remote install without human interaction.

What Phones are compatible?
All Symbian S60 phones, all iPhones models,
all Windows Mobile 5.0 and 6.X OS phones, and all Blackberry 4.2 and above devices are fulll compatabile with our best Spyphone Software. 

How do I install?
Installation is made directly to the Target phone, not the Monitor phone you will use. So you will need access to the Target phone for at least 5 minutes. After purchase, you will immediately receive an email with a link to download your software. Enter the download location into the Target phone’s web browser and the installation will automatically begin.

Check out their subscription plan.

Lifetime

1 Year Change Devices Option

2 Years Change Devices Option

Protect your business and love ones today!


You may like: Mobile phone repair training
Saturday, July 23, 2011

Cell phone spy

Do you need to secretly spy on cell phone? Whether for personal or business purposes cell phone spy software is very important in our lives. There many ways to monitor your family or your business check now how to do it!


cell phone spy


You can record Sms directly to your online account. You can see every call made and time it was made. You can see the location instantly through GPS technology. You can browse all photos and videos taken by the phone. You can view the screen of the phone. All from within your secured online account in stealth mode!

This mobile spy software is great. From now on you can monitor your child or employee if they are abusing their SMS or vehicle privileges. This software is highly recommended for you. Install this small software directly onto the compatible smartphone you wish to monitor to begin recording.

Using the Internet capabilities of your mobile phone, recorded activities, logs and GPS locations are quickly uploaded to your cell phone Spy account. To view the results, you simply login to your secure account at the cellphone Spy web site. Logs are displayed by categories and sorted for easy browsing.

At a very reasonable price you will also be able to see the phone's screen and location on a map LIVE. You can then see mobile information instantly and remotely control the device. The add-on also allows you to have your logs emailed to you.

The program is completely stealth and works independently. Mobile phone Spy does not rely on the phone's call and message logs to record activities. So even if the user tries to delete their tracks, the data will still be retained and uploaded. Compatible with most models of iPhone, BlackBerry or Android phones! Also compatible with Windows Mobile, Symbian OS and iPad.

Download now cell phone spy software. Start protecting your business and your family today!


 You may like: Mobile phone repair training
Friday, July 22, 2011

Cell phone spyware

Do you think you and your family are secured? Do you want to monitor your children? Do you want to know the progress or the performance of your employees? Do you want to know if you are cheated by your wife or husband? Cell phone spyware is the answer to your problem.


There seems to be a growing demand for  phone spyware tracking applications for the mobile phone. Tracking applications find use in different fields and genres. Some of the main uses are listed below.

1.  Stealth Monitoring -  Some features of this stealth applications include GPS tracking GPS is loaded with every thirty minutes, and a link to the map, also featuring the Mobile Spy, which is completely hidden, which they have no idea that they are followed.  Mobile Spy has logging incoming and outgoing each duration and time stamp depends on your setting. You can allow the monitoring of all incoming and outgoing text messages (the whole text), all contacts is recorded, all incoming and outgoing e-mail activity is send to your primary email account. In addition, all URLs visited Internet addresses using the phone's browser is recorded and all the photos taken by Telephone are also recorded.

2.  Catch a cheating spouse mobile phone spyware
Spyware for mobile phone application can also be used to monitor the activities your spouse. It looks like the film right? You can see where the iPhone and the user is present in real time. Here's how it will turn your phone into a high-tech surveillance gadgets to a smartphone GPS enabled. If you believe that your better half has a relationship with someone else, then you can take your spouse with this application. You can control its movements in real time and determine where he / she is.  Using this application is fairly simple. GPS and the phone can send information about the location of the phone's via internet which  is password protected and accessible from any computer. GPS location information is converted to the actual location via Google Maps.

3.  Phone spy application for parents to spy their children

cell phone spyware


4. Cell Phone spy application for cell phone location
For smartphone just like iPhone spy apps you can view information about a video monitoring application. Some things you should know that you need to open / Jailbreak your iPhone, you want to monitor / spy. This means that if you want to sign an application for iPhone, jailbreak to be ready to make the programs work.


Do you want to learn how to repair cellphone?

You may like:  Mobile phone repair training

Cell phone parts

In our mobile phone repair training today I will introduce to you all the basic cell phone parts you will encounter in repairing cellphone.  You will learn all the basic functions of these parts which is important in your daily mobile service.


Different mobile phone parts:


cell phone parts

LCD - It is the acronym for LIQUID CRYSTAL DISPLAY. The LCD produce the output display. You can see all of the information from your cellphone from a simple text messages,photos, videos and many more digital display.


cell phone parts

Earpiece - It is a speaker where the user could hear the voice from the other end of the line.  It is an essential cellphone parts because without it there will be no voice communication.


cell phone parts


Microphone- If earpiece is used to hear the voice from the end of the line.  The microphone is used to send your voice to be hear from the end of the line. 


cell phone parts

Buzzer (Speaker) -  This part of a cell phone is used to produce sound.  You can hear a alert tone for text messaging or a long playing sound if you have an incoming call.


cell phone parts

Keypad -  This is another essential cellphone parts.  Through it you could command the mobile from sms, playing mp3, recording videos and many more...


cell phone parts

Charging pin - This mobile phone parts is used to charge your cellphone.  It is important to recharge your cellphone so could use it the whole day round.

Basically the cell phone parts I discussed above are the most repaired parts by a cellphone technician.

Do you want to learn how to repair mobile phone?

Start my:  Mobile phone repair training

6020 Not Charging

In this tutorial you will learn how to repair Nokia 6020 not charging problem. This is very basic and yet very helpful way of repairing mobile phone


Tools needed:
Toothbrush = you can buy it at a very cheap price
T6 = Nokia Screw to open phone.

1. Disassemble Nokia 6020.


2.  Check / Clean / Replace charging pin.


3.  Clean charging circuit.  Dust off to remove unwanted short circuit.


4.   After cleaning the charging circuitry using used toothbrush and a cleaning solution, assemble the phone and test it.

5.  In this mobile phone charging works like a charm again.  Perfectly in good condition.

Congratulate yourself for a job well done!

You may like:  Mobile phone repair training


Thursday, July 21, 2011

Cell phone Training

In our cell phone repair training today I will teach you how to repair a Nokia 1112 with no light problem.  Take down notes and save my training pictures for future reference.


Procedure:

1. Ask the customer the history of the phone what happen to the mobile phone. It is very important to ask for the history so that the technician could have a hint where to start and how to troubleshoot the cellphone.

2. In this mobile phone training I received a water damage 1112. Now that we know what happened we can proceed first by cleaning the cell phone board.

3. Disassemble and inspect the board for possible shortage or any water residue present from the mobile board.

4. After cleaning using hot air dry the board. Next assemble again the cellphone and try to check if there is now a light. If still the problem exist proceed to the step.

5. Disassemble the phone and using Ohmmeter check for any open pattern using the pictorial diagram. If all the lines are okay . Next is check for the voltage output using the same pictorial diagram. In this cell phone training every output voltage are okay other that the Vled+ which very low. Through voltage checking I suspect that the problem is N2400. Finally replace N2400.

cell phone training

6.  Through voltage checking I suspect that the problem is N2400.  From the schematic diagram below you can confirm that VLED+ is supplied by N2400.   Finally replace N2400.

cell phone training


7. Congratulate yourself for a job well done.


You may like: Mobile phone repair training
Tuesday, July 19, 2011

Choosing a Mobile Phone

Are you looking for a mobile phone? Here are the basic steps when buying a cellphone. Just like buying desktop or laptop computer you have to choose according to your needs.


mobile phone


Basically every mobile phone has a sending message and talking capability. It was only calling capability was available during early age of cellphone until short messaging service was introduce and until today every mobile phone has short messaging service and calling capability. If you are looking for a cheap cellphone this is the only feature you could enjoy.

If you are looking for a more advance mobile phone and you have more budget than the basic cellphone you will consider the technology behind the mobile phone. Here in our country aside from the basic feature of mobile phones playing mp3 carries much weight in buying cellphone. Most Nokia phones nowadays has a memory card slot for expandable memory. A minimum of 1Gb of memory can be found in every Gsm phone. Another advantage of having a memory card you use it to save videos, record videos or movies as well. Another feature you would like to consider in choosing cellular telephone is if it has a built in camera. Camera in mobile phone evolve to a more sophisticated technology. Old camera phone has a very blurred output display compared to the new camera phone which has a very crisp photo output.

Above all the features and capability I discussed above you should consider your budget. You can buy a standard phone for now if your budget is tight or you could buy an awesome phone if you have enough money in your wallet.

Have a great day to all!

But wait do you want to learn how to repair a mobile phone?

Start now your: Cell phone training
Friday, July 15, 2011

Cell phone repair training

In our cell phone repair training today, we will repair a Nokia 6288 no power. Get your notebook and pen and take down notes.


History: The cell phone was brought to me with no sign of power. It did not even charge. In every repair of mobile phone it is a must that you must start from software troubleshooting to hardware troubleshooting. My first theory is software problem.

Tools needed in our cell phone repair training:
Jaf tool box
Nokia 6280 Fbus-cable

Procedure:

1. Connect 6288 to the Jaf tool box using 6280 Fbus cable.

2. Open Jaf software and select BB5 tab.

3. In the flash settings. Check box (manual flash, Factory set)

4. Check use Ini and a pop window will appear select the rm-78 for 6288 model.

5. It will now select the flash files (MCU,PPM.CNT)

6. Tick flash and wait for the program to finish.


Congratulate yourself the phone now is Ok. It is only software problem and the cell phone now is working.

See the screenshot in this cell phone repair training:


Jaf tool box Logs:
JAF version 1.98.64
Detected PKEY: 9000263A
Card life counter: 87.37%
P-key nokia module version 01.02
Detected JAF INTERFACE version: 01.B1, Driver version: 40000, Library version: 30112
JAF DCT4/BB5 LOADERS DIR: C:\Program Files\ODEON\JAF\Flash\
JAF DCT4/BB5 PRODUCT DIR: C:\Program Files\Nokia\Phoenix\Products\
JAF USB LOADERS DIR: C:\Program Files\ODEON\JAF\FlashUSB\
JAF DCT3/DCTL LOADERS DIR: C:\Program Files\ODEON\JAF\Flash3\
USB Cable Driver version: 7.1.36.0
Changing mode...Done!
Fast phone flashing selected.
FILES SET FOR FLASHING:
MCU Flash file: NONE
PPM Flash file: NONE
CNT Flash file: NONE
APE Variant file: NONE
Searching for JAF saved location of ini...
Checking path: C:\Program Files\Nokia\Phoenix\Products\RM-78\

Searching for default location of ini...
Checking path: C:\Program Files\Common Files\Nokia\DataPackage\Products\RM-78\
Scanning ini files...
Searching for default location of ini...
Checking path: C:\Program Files\Common Files\Nokia\DataPackage\Products\RM-78\
FILES SET FOR FLASHING:
MCU Flash file: C:\Program Files\Common Files\Nokia\DataPackage\Products\RM-78\rm7830006.430.mcusw
PPM Flash file: C:\Program Files\Common Files\Nokia\DataPackage\Products\RM-78\rm783006.43.ppm_d
CNT Flash file: C:\Program Files\Common Files\Nokia\DataPackage\Products\RM-78\rm7830006.43.image_o2_cz_nj
APE Variant file: NONE
Languages in ppm: English,German,Slovak,Slovene,Serbian,Hungarian,Czech,Croatian
Backing up CRT data...
Setting FLASH MODE
Loader version: 01.1E.00 -> Revision: 0000
Patching CMT boot step1...
Patching CMT boot step2...
Patching CMT boot step3...
CMT Boot Ready
CMT Flash ID: 002F0001 <=> SPANSION -> 72NS256N
CMT Flash Data: 00000000000000000000000000000000
CMT Loader: C:\Program Files\ODEON\JAF\Flash\RAP3Gv3_algo.fg
Loader version: 01.21.01 -> Revision: 0000
Patching CMT loader step1...
Patching CMT loader step3...
CMT Loader Ready
Reading CMT NPC certificate...
Reading CMT VARIANT certificate...
Reading CMT CCC certificate...
CCC not available...
Reading CMT HWC certificate...
HWC not available...
Saved to C:\Program Files\ODEON\JAF\ProgData\35322601637311_CRT_backup_152157.rpl
Backup CRT OK!
Backing up SIMLOCK data...
Setting local mode...
Reading IMEI...
C:\Program Files\ODEON\JAF\ProgData\12345610654321?_CRT_backup_153157.pm
Done!
Backup LCK OK!
Manual mode selected, version can't be checked!
Booting phone...

CMT Boot Data:
Asic ID: 000000010000022600010006010C192101003000
Asic Mode ID: 00
Asic EM ID: 00000353
Asic Public ID: 1F900009F397015444ADF6B9ED754527B8F691DD
HASH: BAF3A9C3DBFA8454937DB77F2B8852B100000000
ROM ID: 273F6D55DFAAF68F
CMT Boot File: C:\Program Files\ODEON\JAF\Flash\rap3gv3_2nd.fg
Loader version: 01.1E.00 -> Revision: 0000
Patching CMT boot step1...
Patching CMT boot step2...
Patching CMT boot step3...
CMT Boot Ready
CMT Flash ID: 002F0001 <=> SPANSION -> 72NS256N
CMT Flash Data: 00000000000000000000000000000000
CMT Loader: C:\Program Files\ODEON\JAF\Flash\RAP3Gv3_algo.fg
Loader version: 01.21.01 -> Revision: 0000
Patching CMT loader step1...
Patching CMT loader step3...
CMT Loader Ready
Operation took 0 minutes 7 seconds...
No convertion block detected or file already converted.
Erasing...
Operation took 1 minutes 5 seconds...
Writing...
Stage 1
Sending CMT HASH for NOLO
Sending CMT HASH for KEYS
Sending CMT HASH for PRIMAPP
Sending CMT HASH for PASUBTOC
Sending CMT PUB KEYS...
Sending CMT HASH for UPDAPP
Sending CMT HASH for DSP0
Sending CMT HASH for MCUSW
Booting phone...

CMT Boot Data:
Asic ID: 000000010000022600010006010C192101003000
Asic Mode ID: 00
Asic EM ID: 00000353
Asic Public ID: 1F900009F397015444ADF6B9ED754527B8F691DD
HASH: BAF3A9C3DBFA8454937DB77F2B8852B100000000
ROM ID: 273F6D55DFAAF68F
CMT Boot File: C:\Program Files\ODEON\JAF\Flash\rap3gv3_2nd.fg
Loader version: 01.1E.00 -> Revision: 0000
Patching CMT boot step1...
Patching CMT boot step2...
Patching CMT boot step3...
CMT Boot Ready
CMT Flash ID: 002F0001 <=> SPANSION -> 72NS256N
CMT Flash Data: 00000000000000000000000000000000
CMT Loader: C:\Program Files\ODEON\JAF\Flash\RAP3Gv3_algo.fg
Loader version: 01.21.01 -> Revision: 0000
Patching CMT loader step1...
Patching CMT loader step3...
CMT Loader Ready
Operation took 0 minutes 7 seconds...
Stage 1
Sending CMT HASH for PMM_CONF
Sending CMT HASH for SBIF_CONF
FAST MODE finish!
Operation took 2 minutes 2 seconds...
Reseting phone...
PPM: C:\Program Files\Common Files\Nokia\DataPackage\Products\RM-78\rm783006.43.ppm_d

Booting phone...

CMT Boot Data:
Asic ID: 000000010000022600010006010C192101003000
Asic Mode ID: 00
Asic EM ID: 00000353
Asic Public ID: 1F900009F397015444ADF6B9ED754527B8F691DD
HASH: BAF3A9C3DBFA8454937DB77F2B8852B100000000
ROM ID: 273F6D55DFAAF68F
CMT Boot File: C:\Program Files\ODEON\JAF\Flash\rap3gv3_2nd.fg
Loader version: 01.1E.00 -> Revision: 0000
Patching CMT boot step1...
Patching CMT boot step2...
Patching CMT boot step3...
CMT Boot Ready
CMT Flash ID: 002F0001 <=> SPANSION -> 72NS256N
CMT Flash Data: 00000000000000000000000000000000
CMT Loader: C:\Program Files\ODEON\JAF\Flash\RAP3Gv3_algo.fg
Loader version: 01.21.01 -> Revision: 0000
Patching CMT loader step1...
Patching CMT loader step3...
CMT Loader Ready
Operation took 0 minutes 6 seconds...
No convertion block detected or file already converted.
Erasing...
Operation took 0 minutes 16 seconds...
Writing...
Stage 1
Operation took 0 minutes 30 seconds...
Reseting phone...
CNT: C:\Program Files\Common Files\Nokia\DataPackage\Products\RM-78\rm7830006.43.image_o2_cz_nj

Booting phone...

CMT Boot Data:
Asic ID: 000000010000022600010006010C192101003000
Asic Mode ID: 00
Asic EM ID: 00000353
Asic Public ID: 1F900009F397015444ADF6B9ED754527B8F691DD
HASH: BAF3A9C3DBFA8454937DB77F2B8852B100000000
ROM ID: 273F6D55DFAAF68F
CMT Boot File: C:\Program Files\ODEON\JAF\Flash\rap3gv3_2nd.fg
Loader version: 01.1E.00 -> Revision: 0000
Patching CMT boot step1...
Patching CMT boot step2...
Patching CMT boot step3...
CMT Boot Ready
CMT Flash ID: 002F0001 <=> SPANSION -> 72NS256N
CMT Flash Data: 00000000000000000000000000000000
CMT Loader: C:\Program Files\ODEON\JAF\Flash\RAP3Gv3_algo.fg
Loader version: 01.21.01 -> Revision: 0000
Patching CMT loader step1...
Patching CMT loader step3...
CMT Loader Ready
Operation took 0 minutes 7 seconds...
Erasing...
Operation took 0 minutes 41 seconds...
Writing...
Writing converted flash to 128k page
Operation took 0 minutes 59 seconds...
Reseting phone...
Done!
Total time: 5 Minutes, 56 Seconds

DCT4/BB5 counter: 727
After flash processing...
Waiting for phone to boot...
Reading...
Phone type: RM-78, Software version: 06.43
IMEI: 353226016373114
APE Ver: (null)
Variant Ver: (null)
Product Code: 0542228
Setting FULL FACTORY......Setting test mode...
Setting FULL FACTORY...
Operation took 0 minutes 5 seconds...
Done!
Done!
Done!


In this cellphone repair training, You learned how to repair a no power cellphone by using Jaf tool box.

Where to Start your:  Cell phone repair training
Sunday, July 10, 2011

n73 keypad problem and solution

In this tutorial I will teach you how to repair a n73 keypad problem. It can be done in 5-15 minutes defending on your skills in electronics troubleshooting and pictorial diagram reading.


Tools needed in repairing n73 keypad problem:

magnetic wire
Magnetic wire - for jumper solutions

soldering iron
Soldering iron

multitester
Multitester


Procedure:

In this case I received a N73 water damage with keypad problem hash is not working.  I disassemble the phone and I found out that It is free of dirt and water residue.  I clean the keypad board and still it would not work.  My conclusion now is that there is an open pattern.

Using the pictorial diagram below I can determine which connections is open.  You can use the multi tester to perform the continuity test.

After testing the open pattern I found out that connections number 23 is open.  Using your soldering iron you need to connect the line from 23 of hash symbol to 23 of number 9 using magnetic wire.  To check if you connect it correctly use again your multitester.  If there is a continuity you done perfectly.

Assemble the unit and congratulate yourself your done repairing n73 keypad problem.


You may like:  Mobile phone repair training
Saturday, July 9, 2011

7100s camera on standby problem

How to repair 7100s camera on standby problem? This jumper solution solved the 7100s camera on standby problem. This solution needs your soldering skills, using hot-air tool and pictorial solution reading.


Steps:

1. Remove the crystal driver from the image using hot-air tool.

2. Make the jumper solution from the image using jumper wire and soldering iron.


You may like: Mobile phone repair training
Wednesday, July 6, 2011

Cell Phone Repairs Studies

Do you want to learn how to repair cell phone?  In this cell phone repairs studies you  will learn all the basic and advanced skills in servicing mobile phone.  This program is backup by years of experience in repairing cell phone.

First chapter will focus on the basic tools every technician should know how to use the multimeter.  You will learn how to measure resistance, capacitance. voltage, batteries etc.  You will be learn all the electronic components like resistor, capacitors, diode transistors, led, etc. that are commonly found on the board of a cell phone.  The different electrical parameters like current, voltage and frequency are also discussed in this course to aid use in our cell phone repair training course.

Second Chapter will discuss the different mobile components you will found on a typical mobile phone.  Most of the parts are speaker, microphone, vibrator, charging connector, memory and antenna.  You will learn to differentiate the  batteries, standby time and talk time.  You will learn the chargers found from different mobile phone.

Chapter 3 is an introduction about Global System for Mobile Communication (GSM)
  • GSM / CDMA Technology
  • Basic Working
  • Different terms used in mobile phones – Bluetooth, SMS, Memory Cards
  • Different services – GPRS, WAP, 2G, 3G
  • Different Functions – Speed dialing, Call waiting, Call conference etc.

After the introduction about mobile theory will proceed to the most exciting part the troubleshooting of mobile phone.  You will learn the tools used in opening cell phones.  You will learn how to disassemble different kind of mobile phone and assemble as well.  You will learn how to measure and test basic components like speakers, mic, vibrators and buzzer.  You will learn how to replace this basic components like changing broken lcd, antennas and charging connector.

In our advanced technique in troubleshooting mobile hardware.  You will learn the different sections in mobile phone.  The PFO section, Rf section and baseband section discuss in very detail and in layman terms.  You will be introduce to the different IC found and electronic components like PA, antenna switch, RAM IC,  Cobba,  Power IC,  CPU, filters, thavo etc.  You will be trained how to solder and desolder components.  You will the learn how to use hot air tool or blower to remove IC and replace bad IC.  We will teach you how to read schematic diagram and how to use pictorial diagram in your daily cell phone repairs studies.  Finally you will learn how to use schematic diagram in troubleshooting mobile phone.

 At the end of this cell phone repairs studies you will learn how to use different tool box in flashing / programming mobile phone.  You will learn the different ways of unlocking mobile phone by using different tool box.

Start Mobile Phone Repair Training Now


Monday, July 4, 2011

How to repair cell phone

Do you want to know how to repair cell phone? In this tutorial on How to repair mobile you will learn all the basics and advanced skills.


In this cell phone repair tutorial you will be equip with the most basic skills from identifying electronics components, reading schematic diagram, testing electronics circuits/components, troubleshooting, replacing components and many more.

Is there a minimum requirement to learn these skills? Nope. Yes, Everyone can learn these skills. What you need is the determination and interest to learn everything from the very beginning to the expert level.

You can understand every words from this mobile phone repair tutorial. Every reading materials are carefully written to be learn by novice up to the engineer level.

This how to learn repair cell phone guide is back up with years of experience from the very beginning of my humble journey in fixing phone.

You will become complete mobile repair professional by completing this program. After completing the course you will be able to repair minor as well as major handset faults.

Start Mobile Phone Repair Training Now
Sunday, July 3, 2011

How to unlock phone security code

In this tutorial on how to unlock phone security code, I will use nokia 1110i for demonstration purposes. You will learn how to use Jaf tool box to remove nokia phone security code.


Tools:
Jaf tool box
1100 data cable

Procedure:

1. Open Jaf software.

2. Connect the 1110i to the tool box using 1100 data cable.

3. Tick CHK.

If there is a good connection from the phone to the toolbox. You will these logs:

MCU ID: 0x2201
FLASH ID0: 226800EC <=> SAMSUNG (SEC) -> K8S3215ETE Addr0: 0x01000000 - 0x01FFFFFF, SectorSize0: 10
FLASH ID1: 00010000 <=> Flash -> not used Addr1: 0x02000000 - 0x02FFFFFF, SectorSize1: 0
First 16 bytes: AD 7E B6 1A 1B BE 0B E2 7D 58 6B E4 DB EE 65 14
Checking RAM for ALGO...
Algo is ready...
Checking FAID calculation...
P-key nokia module version 01.02
Done!


4. Click INF to test if the phone is good and has power. You see this logs if the phone is Ok with power.

Reading...
MCU SW version: V 6.00
24-10-06
RH-93
(c) NMP
HW version: 0526
PCI version:
UEM version: 1328
UPP version: 8705
RFIC version: 0500
DSP version: P05w06.v34
LCD version: WINTK:MYKS01
PPM version: V 6.00
24-10-06
RH-93
(c) NMP
MA
ADSP SW version: V 6.00\n24-10-06\nRH-93\n(c) NMP\nma
Production serial number: IHC400785
Product code: 0542848
Module code: 0203169
Basic production code: 0536354
Flash code:
Order number:
Product specific data:
Long production SN:
ATO:
Default SN type:
IMEI plain: 354817017891739
IMEI spare to net: 3A 45 18 07 71 98 71 03
IMEI SV to net: 33 45 18 07 71 98 71 33 F1
Master Code: 1074046356
Phone type: RH-93, Software version: 6.00, Language Pack: MA
User code: €

Block 1:
Lock 1: CLOSED -> Lock Data: 51503F

Searching for saved ini...
Checking for file C:\Program Files\ODEON\JAF\JAF_RH-93.ini
Saved INI not found, loading INI list...
Setting local mode...
Reading product code...
Product Code: 0542848
Checking path: C:\Program Files\Nokia\Phoenix\Products\RH-93\


5. Now is the time on how unlock phone security code.

6. In service operations check the box with Factory settings see also the image below.

7. Tick service the select Factory set full. tick write. see the logs below.

Searching for default location of ini...
Checking path: \Products\RH-93\
Searching for JAF saved location of ini...
Checking path: C:\Program Files\Nokia\Phoenix\Products\RH-93\
No ini files found...
FILES SET FOR FLASHING:
MCU Flash file: NONE
PPM Flash file: NONE
CNT Flash file: NONE
ADSP Flash file: NONE
APE Variant file: NONE
APE User Flash file: NONE
Done!
Setting test mode...
Setting FULL FACTORY...
Operation took 0 minutes 7 seconds...
Done!


8. You are finish. Congratulate yourself for a job well done.

Screenshot:

How to unlock phone security code

In this tutorial you learn how to unlock phone security code using Jaf tool box.

If you want to learn how to repair cell phone = )

You may like:  Mobile phone repair training
Friday, July 1, 2011

Unlock V3re

In this tutorial I will teach you how to unlock V3re. This procedure is based on my actual experience in unlocking v3re.


Tools:
Smartclip tool box
Smart tp ver 1

1. Disassemble the v3re phone.

2. Using the smart tp ver1 connect the supply and red tp to tp point.


3. Open the smartclip software then go to prepare phone. Check if there is good connectivity from the phone to the tool box by ticking search. If the phone is detected proceed to unlocking. Check the checkbox "unlock automatically after prepare phone" Then tick prepare phone.

4. Follow the procedure from the software.

5. Finally your done.


Screenshot:

Unlock V3re


Logs:

SmartMoto 4.05
S-Card: 934475416 Smart-Clip dongle, v 3.03, assigned Smart-Clip: 311929431 Europe, initializing... OK
Clip serial: 311929431, version: 5.02, initializing... OK
Searching for phone... no phone found
Clip serial: 311929431, version: 5.02, initializing... OK
Searching for phone... no phone found
Searching for phone... found Motorola Phone (V3re), getting test interface... OK
Model V3re
Firmware R3442A_G_0E.43.08R
Switching to flash mode... OK [S Flash Neptune LTE2]
Reading phone boot version... C.C1
io timeout
Searching for phone... no phone found
Searching for phone... found Motorola Phone (V3re), getting test interface... OK
Model V3re
Firmware R3442A_G_0E.43.08R
Switching to flash mode... OK [S Flash Neptune LTE2]
Reading phone boot version... C.C1
io timeout
Searching for phone... no phone found
Searching for phone... found Motorola Phone (V3re), getting test interface... OK
Model V3re
Firmware R3442A_G_0E.43.08R
Switching to flash mode... OK [S Flash Neptune LTE2]
Reading phone boot version... C.C1
io timeout
Searching for phone... no phone found
Searching for phone... found Motorola Phone (V3re), getting test interface... OK
Model V3re
Firmware R3442A_G_0E.43.08R
Switching to flash mode... OK [S Flash Neptune LTE2]
Reading phone boot version... C.C1
io timeout
Clip serial: 311929431, version: 5.02, initializing... OK
Searching for phone... no phone found
Searching for phone... found Motorola Phone (V3re), getting test interface... OK
Model V3re
Firmware R3442A_G_0E.43.08R
Switching to flash mode... OK [S Flash Neptune LTE2]
Reading phone boot version... C.C1
io timeout
Clip serial: 311929431, version: 5.02, initializing... OK
Searching for phone... found S Flash Neptune LTE2, getting test interface... interface not found
Switching to flash mode... OK
Reading phone boot version... C.C1
io timeout
Searching for phone... found S Flash Neptune LTE2, getting test interface... interface not found
Switching to flash mode... OK
Reading phone boot version... C.C1
io timeout
Searching for phone... found Motorola Phone (V3re), getting test interface... OK
Model V3re
Firmware R3442A_G_0E.43.08R
Switching to flash mode... OK [S Flash Neptune LTE2]
Reading phone boot version... C.C1
io timeout
Searching for phone... no phone found
Searching for phone... found Motorola Phone (V3re), getting test interface... OK
Model V3re
Firmware R3442A_G_0E.43.08R
Switching to flash mode... OK [S Flash Neptune LTE2]
Reading phone boot version... C.C1
Sending boot... OK
Stored temporary backup to C:\Program Files\GsmServer\SmartMoto\temporary backup\bkp_F901A7D2E2152358.bk_
Searching for phone... found Motorola Phone (V3re), getting test interface... OK
Switching to flash mode... OK [S Flash Neptune LTE2]
Reading phone boot version... C.C1
Sending boot... OK
Erasing flash memory OK
Sending firmware OK
Searching for phone... found S Flash Neptune LTE2
Switching to flash mode... OK
Searching for phone... found S Flash Neptune LTE2
Switching to flash mode... OK
Searching for phone... found S Flash Neptune LTE2
Switching to flash mode... OK
Searching for phone... found S Flash Neptune LTE2
Switching to flash mode... OK
Searching for phone... found S Flash Neptune LTE2
Switching to flash mode... OK
Searching for phone... found S Flash Neptune LTE2
Switching to flash mode... OK
Searching for phone... found S Flash Neptune LTE2
Switching to flash mode... OK
Searching for phone... found S Flash Neptune LTE2
Switching to flash mode... OK
Searching for phone... found S Flash Neptune LTE2
Switching to flash mode... OK
Searching for phone... found S Flash Neptune LTE2
Switching to flash mode... OK
Reading phone boot version... 0.00
load error
Searching for phone... found S Flash Neptune LTE2, getting test interface... interface not found
Switching to flash mode... OK
Reading phone boot version... C.C1
Sending boot... OK
Erasing flash memory OK
Sending firmware OK
Searching for phone... found S Flash Neptune LTE2
Switching to flash mode... OK
Reading phone boot version... 0.00
Reading flash id... Intel - M18LR256A
Phone group: V3re,K1/s
Hardware IMEI: 359615012166676
IMEI OTP status: locked
Security area saved to "PDS for S Flash Neptune LTE2 359615012166676.mbk"
Performing restore from temparary backup file C:\Program Files\GsmServer\SmartMoto\temporary backup\bkp_F901A7D2E2152358.bk_
Restore OK
Unlocking phone... OK

In this tutorial you learn how to use Smart-clip to unlock Motorola phones specially how to openline V3re


Do you want to learn how to unlock cell phone?

You may like:  Mobile phone repair training
Thursday, June 30, 2011

6120c Light Solution

This tutorial is about how to repair 6120c light problem. This problem usually occurs when the phone is dropped intentionally or unintentionally causing IC and electronics component to malfunction.


6120c light
6120c light solution


Procedure:

1. First try to replace the coil. Refer to the image above. If no luck proceed to 2.

2. Replace betty IC. In my experience 6120c light problem especially with no light in the keypad as well is done by replacing Betty IC.

3. Finally if still no light try to replace the diode from image I manage to get a replace for diode in the 3100 / 6100 board.


I hope at this point you already fix your 6120c light problem.

If you want to learn how to repair cell phone then ;

Start your mobile phone repair training now
Monday, June 27, 2011

2600c unlock security code

In this tutorial you will learn how to flash 2600c to unlock security code


This unit was brought to me by my regular customer here in my shop. I tried to reset the factory settings but it would not work. After trying two to three times I decided to flash the phone.

Tools:
Jaf tool box
3 in 1 easy cable

Procedure:

1. Open Jaf software. Check factory set.

2. Load MCU and PPM files

3. Tick Flash

4. Wait until the software finish.

5. You are done.


Screenshot:

unlock security code


Logs:

Getting MCU ID

MCU ID: 0x3162
FLASH ID0: 220800EC <=> SAMSUNG (SEC) -> K8F5615ETM/K5G5629ATD Addr0: 0x01000000 - 0x01FFFFFF, SectorSize0: 11
FLASH ID1: 00010000 <=> Flash -> not used Addr1: 0x02000000 - 0x02FFFFFF, SectorSize1: 0
First 16 bytes: AD 7E B6 1B 00 FF 10 40 00 00 00 00 00 00 00 00
Checking RAM for ALGO...
Algo is ready...
Checking FAID calculation...
P-key nokia module version 01.02
Done!
Phone Restarted...
Phone Type:
FILES SET FOR FLASHING:
MCU Flash file: NONE
PPM Flash file: NONE
CNT Flash file: NONE
ADSP Flash file: NONE
APE Variant file: NONE
APE User Flash file: NONE
Phone Type:
FILES SET FOR FLASHING:
MCU Flash file: C:\Program Files\Nokia\Phoenix\Products\rm-340\rm340__06.82.mcusw
PPM Flash file: NONE
CNT Flash file: NONE
ADSP Flash file: NONE
APE Variant file: NONE
APE User Flash file: NONE
Phone Type:
FILES SET FOR FLASHING:
MCU Flash file: C:\Program Files\Nokia\Phoenix\Products\rm-340\rm340__06.82.mcusw
PPM Flash file: C:\Program Files\Nokia\Phoenix\Products\rm-340\rm340__06.82.ppm_ej
CNT Flash file: NONE
ADSP Flash file: NONE
APE Variant file: NONE
APE User Flash file: NONE
Phone Type:
FILES SET FOR FLASHING:
MCU Flash file: C:\Program Files\Nokia\Phoenix\Products\rm-340\rm340__06.82.mcusw
PPM Flash file: C:\Program Files\Nokia\Phoenix\Products\rm-340\rm340__06.82.ppm_ej
CNT Flash file: C:\Program Files\Nokia\Phoenix\Products\rm-340\rm340__06.82.image_ej
ADSP Flash file: NONE
APE Variant file: NONE
APE User Flash file: NONE
Backing up PM Field 208 as RPL...
Setting local mode...
Reading IMEI...
Reading IMEI data...
Building RPL backup file...
C:\Program Files\ODEON\JAF\ProgData\351946032013160_imei_backup_957276.rpl
Done!
Backup imei OK!
MCU: C:\Program Files\Nokia\Phoenix\Products\rm-340\rm340__06.82.mcusw
Booting phone...
FILES SET FOR FLASHING:
MCU Flash file: C:\Program Files\Nokia\Phoenix\Products\rm-340\rm340__06.82.mcusw
PPM Flash file: C:\Program Files\Nokia\Phoenix\Products\rm-340\rm340__06.82.ppm_ej
CNT Flash file: NONE
ADSP Flash file: NONE
APE Variant file: NONE
APE User Flash file: NONE
FILES SET FOR FLASHING:
MCU Flash file: C:\Program Files\Nokia\Phoenix\Products\rm-340\rm340__06.82.mcusw
PPM Flash file: NONE
CNT Flash file: NONE
ADSP Flash file: NONE
APE Variant file: NONE
APE User Flash file: NONE
FILES SET FOR FLASHING:
MCU Flash file: NONE
PPM Flash file: NONE
CNT Flash file: NONE
ADSP Flash file: NONE
APE Variant file: NONE
APE User Flash file: NONE
Phone Type:
FILES SET FOR FLASHING:
MCU Flash file: C:\Program Files\Nokia\Phoenix\Products\rm-340\rm340__07.60.mcusw
PPM Flash file: NONE
CNT Flash file: NONE
ADSP Flash file: NONE
APE Variant file: NONE
APE User Flash file: NONE
Phone Type:
FILES SET FOR FLASHING:
MCU Flash file: C:\Program Files\Nokia\Phoenix\Products\rm-340\rm340__07.60.mcusw
PPM Flash file: C:\Program Files\Nokia\Phoenix\Products\rm-340\rm340__07.60.ppm_el
CNT Flash file: NONE
ADSP Flash file: NONE
APE Variant file: NONE
APE User Flash file: NONE
Phone Type:
FILES SET FOR FLASHING:
MCU Flash file: C:\Program Files\Nokia\Phoenix\Products\rm-340\rm340__07.60.mcusw
PPM Flash file: C:\Program Files\Nokia\Phoenix\Products\rm-340\rm340__07.60.ppm_el
CNT Flash file: C:\Program Files\Nokia\Phoenix\Products\rm-340\rm340__07.60.image_el
ADSP Flash file: NONE
APE Variant file: NONE
APE User Flash file: NONE
Backing up PM Field 208 as RPL...
Setting local mode...
Reading IMEI...
Reading IMEI data...
Building RPL backup file...
C:\Program Files\ODEON\JAF\ProgData\351946032013160_imei_backup_959276.rpl
Done!
Backup imei OK!
MCU: C:\Program Files\Nokia\Phoenix\Products\rm-340\rm340__07.60.mcusw
Booting phone...
MCU ID: 0x3162
BOOT file: C:\Program Files\ODEON\JAF\Flash\u3_2nd.fia
Loader version: 04.46.01 -> Revision: 0007
Boot size is 0x09A8
Boot is ready...
FLASH ID0: 220800EC <=> SAMSUNG (SEC) -> K8F5615ETM/K5G5629ATD Addr0: 0x01000000 - 0x01FFFFFF, SectorSize0: 11
FLASH ID1: 220800EC <=> SAMSUNG (SEC) -> K8F5615ETM/K5G5629ATD Addr1: 0x02000000 - 0x02FFFFFF, SectorSize1: 11
First 16 bytes: AD 7E B6 1B 00 FF 10 40 00 00 00 00 00 00 00 00
Flash ID is 0x0822EC00
Flash loader is C:\Program Files\ODEON\JAF\Flash\u3_amd.fia
Loader version: 04.46.01 -> Revision: 0007
Loader size is 0x7528; Loader chk: a2
Loader is ready...
P-key nokia module version 01.02
MSID: 84FDE1C5E21A9533E96D0AEE81
MSID decoded: 2C40BAE900C906E2AA000000
FAID: 7A496353ED1C2E13212C3669
Operation took 0 minutes 12 seconds...
Erasing...
Found 2 interval(s) to erase
Erasing area: 01000000 - 0101FFFF...
Erasing area: 01020000 - 01C3FFFF...
Operation took 0 minutes 35 seconds...
Writing...
Perm. Data Restore OK
Operation took 5 minutes 38 seconds...
Restarting MCU...
CNT: C:\Program Files\Nokia\Phoenix\Products\rm-340\rm340__07.60.image_el
Booting phone...
MCU ID: 0x3162
BOOT file: C:\Program Files\ODEON\JAF\Flash\u3_2nd.fia
Loader version: 04.46.01 -> Revision: 0007
Boot size is 0x09A8
Boot is ready...
FLASH ID0: 220800EC <=> SAMSUNG (SEC) -> K8F5615ETM/K5G5629ATD Addr0: 0x01000000 - 0x01FFFFFF, SectorSize0: 11
FLASH ID1: 220800EC <=> SAMSUNG (SEC) -> K8F5615ETM/K5G5629ATD Addr1: 0x02000000 - 0x02FFFFFF, SectorSize1: 11
First 16 bytes: AD 7E B6 1B 00 FF 10 40 00 00 00 00 00 00 00 00
Flash ID is 0x0822EC00
File is already converted to 128k page...
Flash loader is C:\Program Files\ODEON\JAF\Flash\u3_amd.fia
Loader version: 04.46.01 -> Revision: 0007
Loader size is 0x7528; Loader chk: a2
Loader is ready...
P-key nokia module version 01.02
MSID: 8485F2A93EF510096AF1D52129
MSID decoded: D26EBAF100C906E2AA000610
FAID: 82F27D60CA866EE5EF06569A
Operation took 0 minutes 10 seconds...
Erasing Content Pack...
Found 2 interval(s) to erase
Erasing area: 02000000 - 02DBFFFF...
Erasing area: 02DC0000 - 02F9FFFF...
Operation took 1 minutes 26 seconds...
Writing...
Perm. Data Restore OK
Operation took 1 minutes 26 seconds...
Restarting MCU...
Operation took 0 minutes 0 seconds...
Extracting Content Pack...
Running: (c) Nokia File Server
CNT Extract OK.
Operation took 0 minutes 5 seconds...
PPM: C:\Program Files\Nokia\Phoenix\Products\rm-340\rm340__07.60.ppm_el
Booting phone...
MCU ID: 0x3162
BOOT file: C:\Program Files\ODEON\JAF\Flash\u3_2nd.fia
Loader version: 04.46.01 -> Revision: 0007
Boot size is 0x09A8
Boot is ready...
FLASH ID0: 220800EC <=> SAMSUNG (SEC) -> K8F5615ETM/K5G5629ATD Addr0: 0x01000000 - 0x01FFFFFF, SectorSize0: 11
FLASH ID1: 220800EC <=> SAMSUNG (SEC) -> K8F5615ETM/K5G5629ATD Addr1: 0x02000000 - 0x02FFFFFF, SectorSize1: 11
First 16 bytes: AD 7E B6 1B 00 FF 10 40 00 00 00 00 00 00 00 00
Flash ID is 0x0822EC00
Flash loader is C:\Program Files\ODEON\JAF\Flash\u3_amd.fia
Loader version: 04.46.01 -> Revision: 0007
Loader size is 0x7528; Loader chk: a2
Loader is ready...
P-key nokia module version 01.02
MSID: 8410E66A38E9280FC9A4BE980D
MSID decoded: 3E4EBAE900C906E2A8000000
FAID: E9F15B52DFB336E5603F00FB
Operation took 0 minutes 10 seconds...
Erasing PPM...
Found 1 interval(s) to erase
Erasing area: 01C40000 - 01FFFFFF...
Operation took 0 minutes 11 seconds...
Writing...
Perm. Data Restore OK
Operation took 1 minutes 11 seconds...
Restarting MCU...
Flashing Done!
Operation took 11 minutes 14 seconds...

After flash processing...
Waiting for phone to boot...
Reading...
Phone type: RM-340, Software version: 07.60
IMEI: 351946032013160
Product Code: 0557449
Resetting PPC...
Setting FULL FACTORY......Setting test mode...
Setting FULL FACTORY...
Operation took 0 minutes 4 seconds...
Done!
Done!
Done!


You may like:  Mobile Phone repair training

How to unlock code

In this tutorial I will teach to you how to unlock code.

In servicing mobile phone every technician must have a skills on how to unlock code.
For demonstration purposes I will use a Nokia 1650. Every type of mobile phone has its own tool box.

Tools:
Jaf tool box  (Nokia)
1100 cable

Procedure:

1. Open the Jaf Software.

2. Connect the 1650 using 1100 cable to the tool box.

3. Tick CHK to determine if there is a good connection from the phone to the tool box.

4. Tick INF to determine the type of mobile you are going to remove the unlock code.

5. Check the box of the factory settings from the service settings. Tick service button

6. Select "factory set full".

7. Tick write. You are finish.

In this tutorial you learn how to unlock code using Jaf tool box for Nokia mobile phone.


Screenshot here:

how to unlock code


You may like:  Mobile phone repair training
 
Total Pageviews
About this blog
This blog is a collection of Gsm and Gadgets firmwares, downloads, softwares, tools, etc.
free counters